Curve Finance Guide: wBTC to iBTC
Follow our detailed, easy-to-understand instructions to seamlessly convert your Wrapped Bitcoin (wBTC) into iBTC using CurveDEX.
Prateek Ranka
January 28, 2025
Step 1: Access CurveDEX and Connect Your Wallet
Navigate to CurveDEX:
Open your web browser and go to curve.fi.
Ensure you are on the Ethereum mainnet to access the full range of DeFi tools.

Switch to the Ethereum mainnet on Curve.fi
Connect Your Wallet:
Click the "Connect Wallet" button located at the top right corner of the homepage.
Choose your preferred Web3 wallet (e.g., MetaMask, WalletConnect, Ledger, etc.). This example chooses MetaMask but the process should be fairly similar for other wallets too.
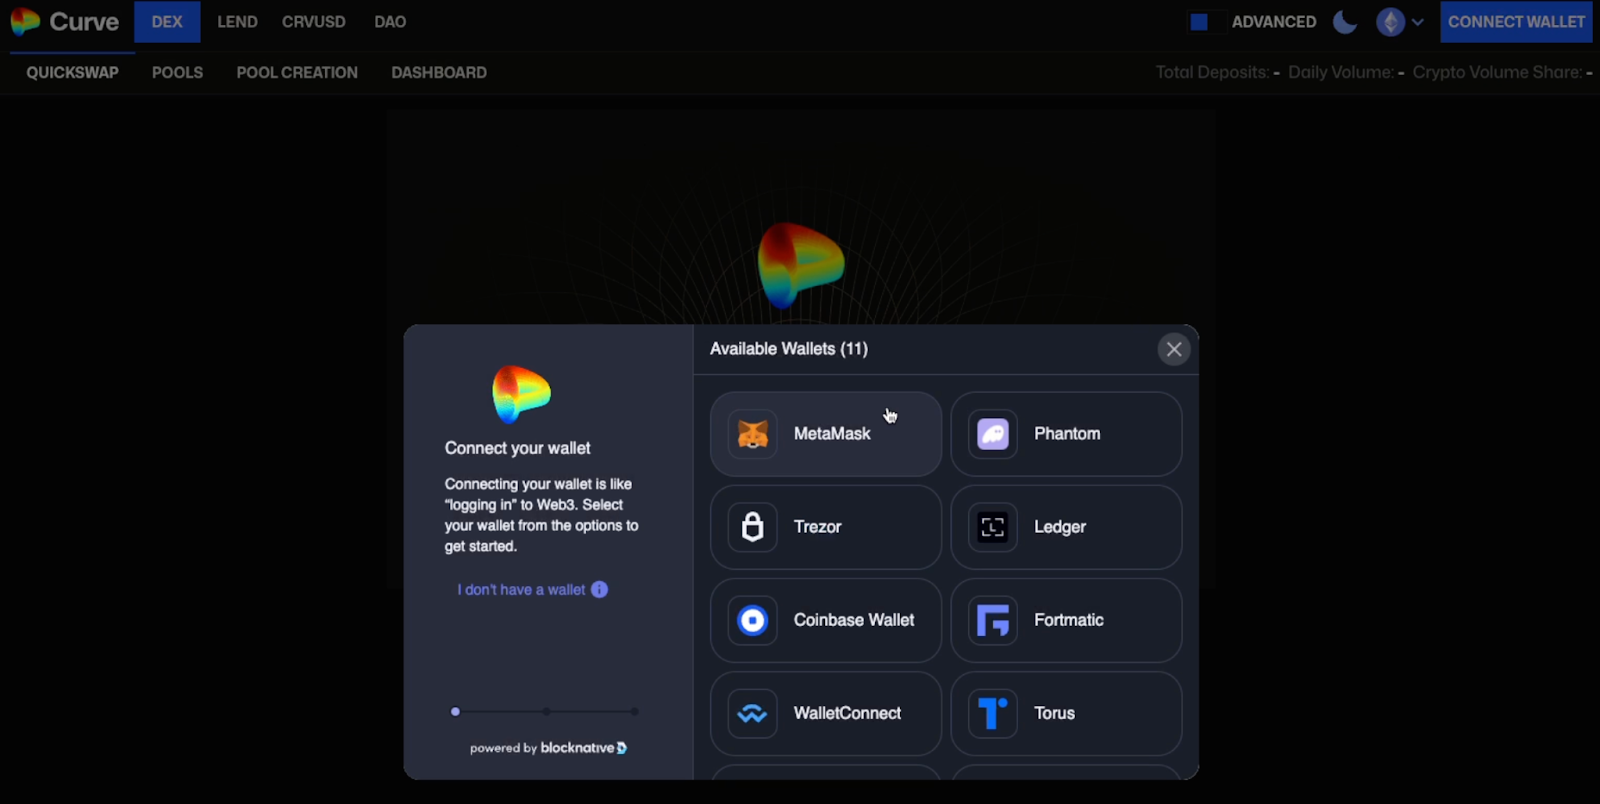
Connect your favorite wallet to Curve
Follow the prompts to securely connect your wallet to CurveDEX.
Step 2: Select Tokens for Swap
Initiate the Swap:
Once your wallet is connected, navigate to the "Exchange" section of CurveDEX.
Choose Your Tokens:
In the top box, select wBTC (Wrapped Bitcoin).
In the bottom box, search for and select iBTC. If iBTC is not listed, ensure you have the correct contract address or check for network compatibility.
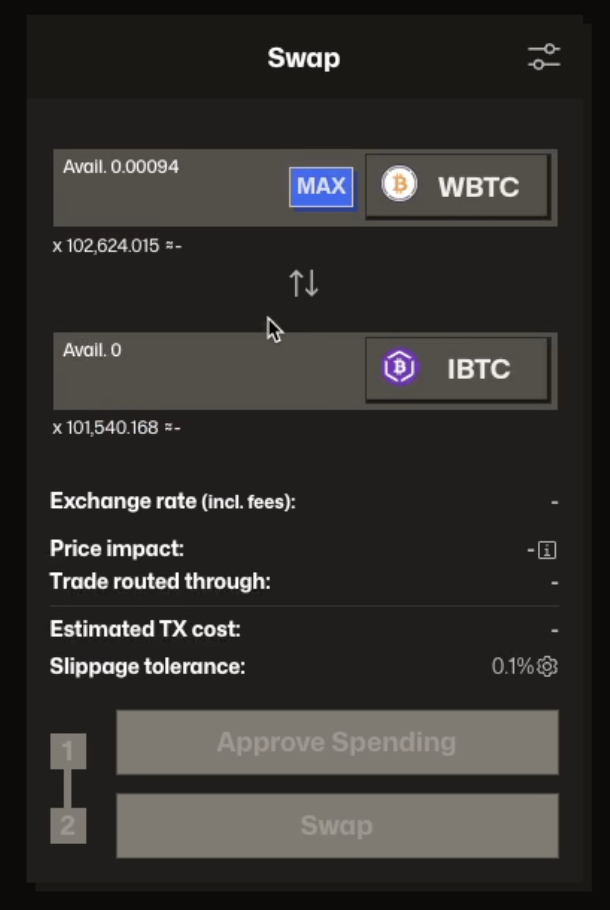
Select your tokens for the swap
Step 3: Set Swap Amount
Determine Swap Amount:
Enter the amount of wBTC you wish to convert to iBTC.
Alternatively, click the "Max" button to use your entire wBTC balance for the swap.
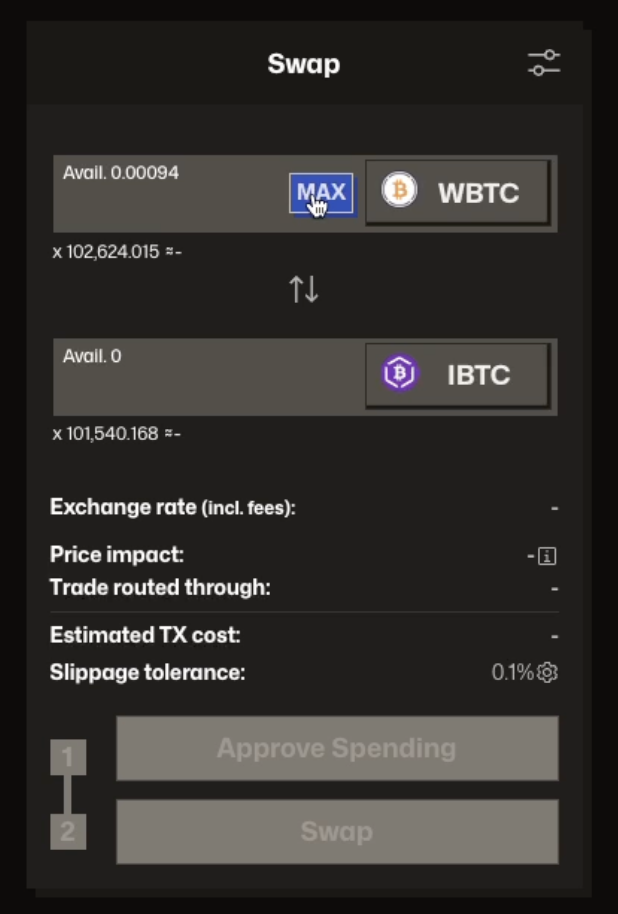
Determine swap amount
Step 4: Approve Spend
Approve Token Spending:
Before executing the swap, you need to authorize CurveDEX to spend your wBTC.
Click the "Approve Spending" button.
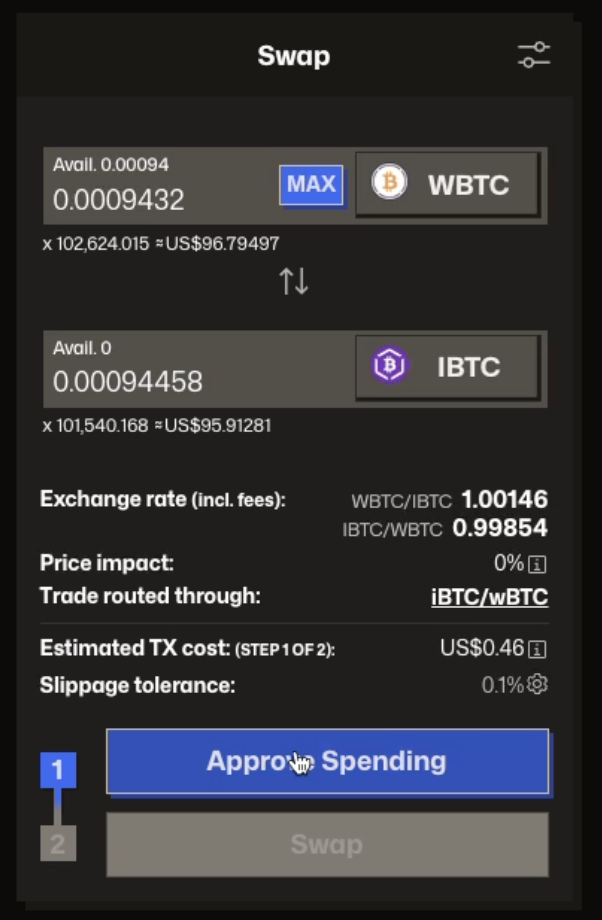
Approve token spending
Confirm the approval transaction in your connected wallet (e.g., MetaMask). This step ensures that CurveDEX can access your wBTC for the swap.
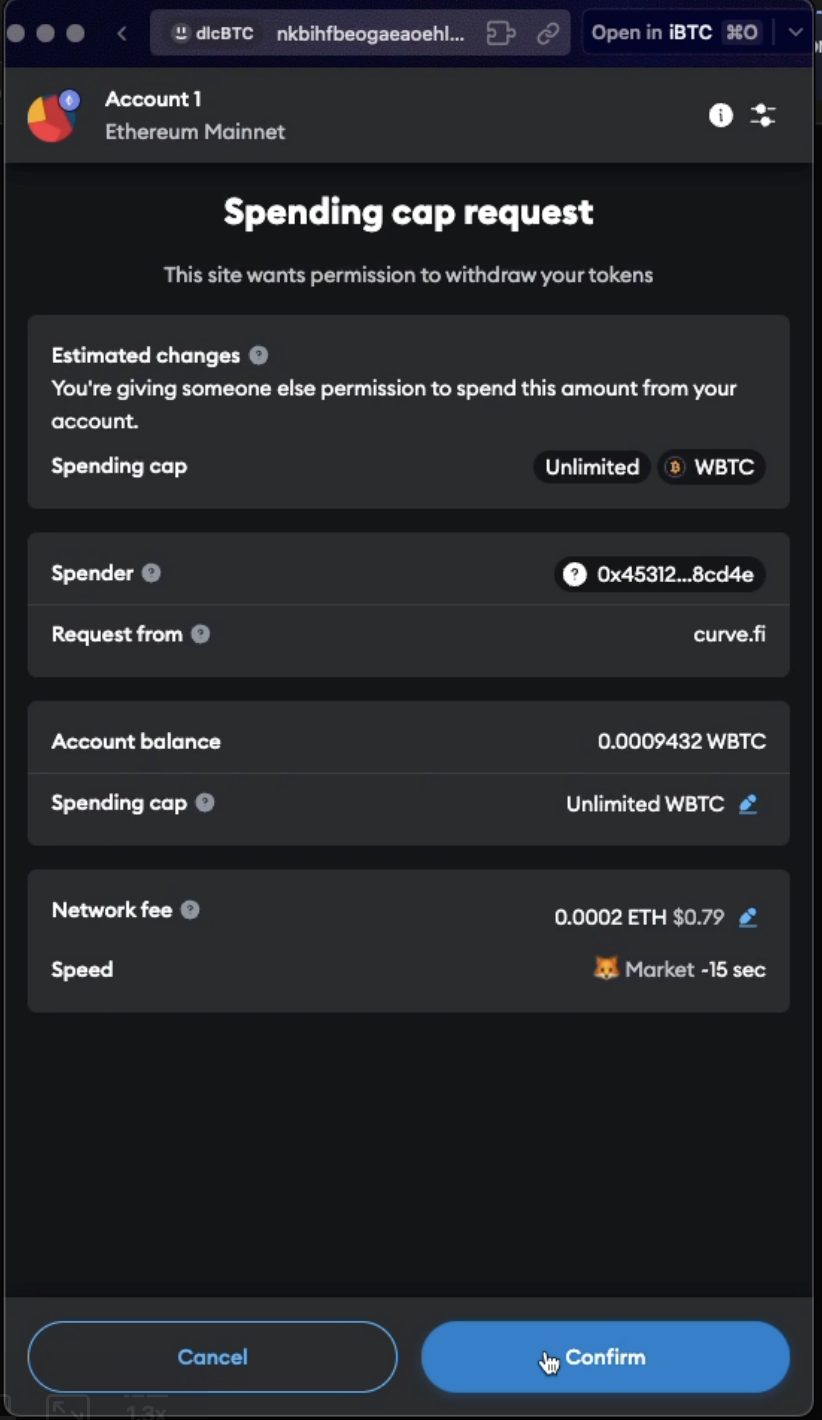
Confirm approval transaction
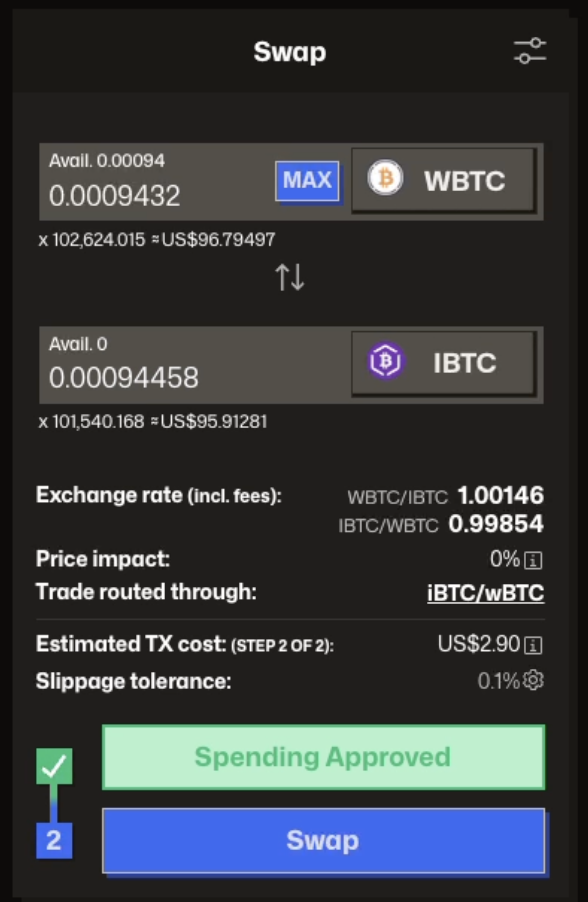
Step 5: Review Transaction Details
Check Transaction Costs:
Review the estimated transaction fee displayed (typically around $2.90).
Note the slippage rate, which is usually low (approximately 0.1%), ensuring minimal price impact.
Observe the cash fee associated with the swap (around $4.40).
Ensure Accuracy:
Double-check all details, including the amount of wBTC, the equivalent iBTC to be received, and the total fees involved.
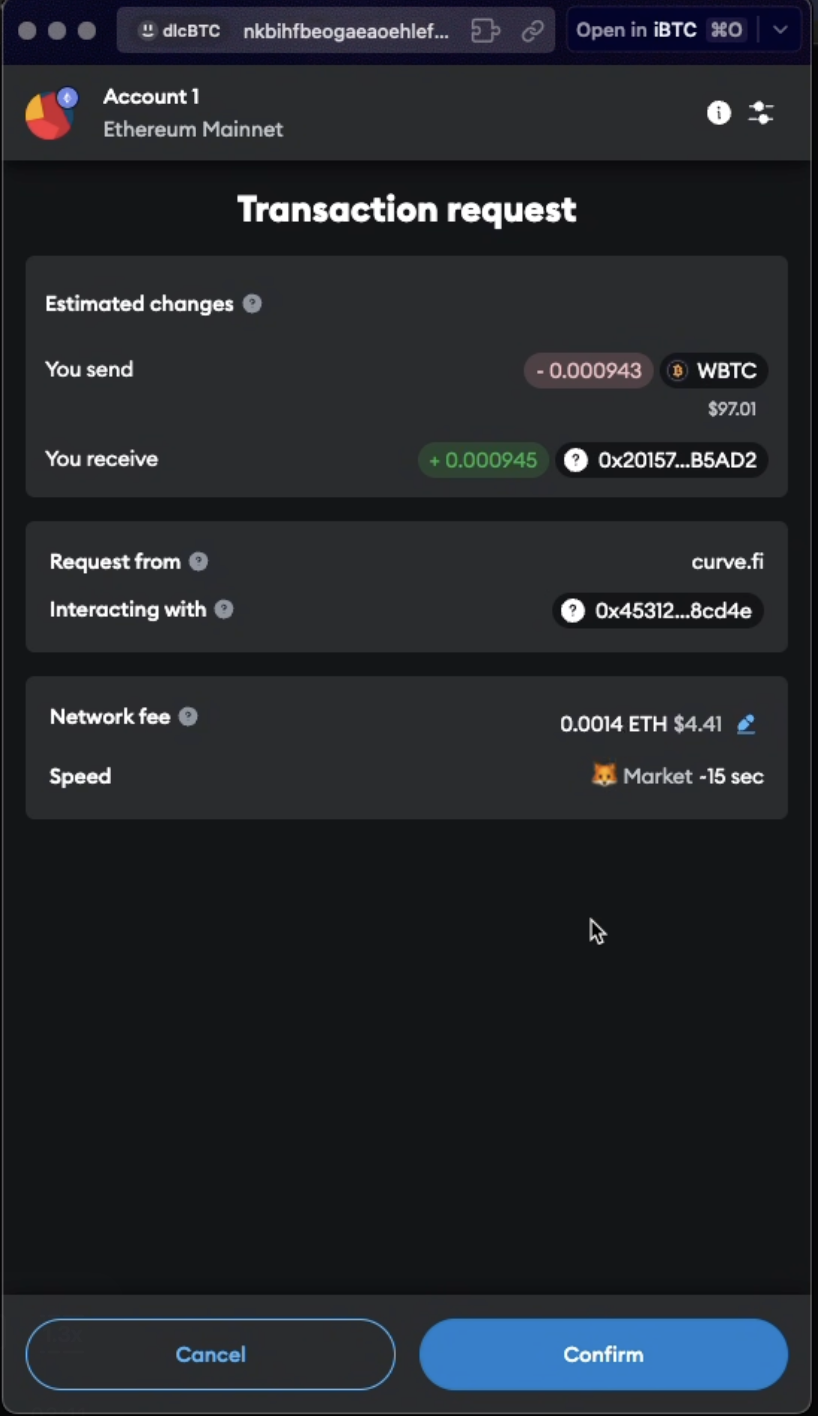
Step 6: Complete the Swap
Execute the Swap:
Click the "Swap" button to initiate the transaction.
Your wallet will prompt you to confirm the swap. Review the details once more and approve the transaction.
Execute the swap
Authorize in Wallet:
Confirm the swap within your wallet (e.g., MetaMask). Ensure you have sufficient ETH to cover gas fees for the transaction.
Authorize transaction in wallet
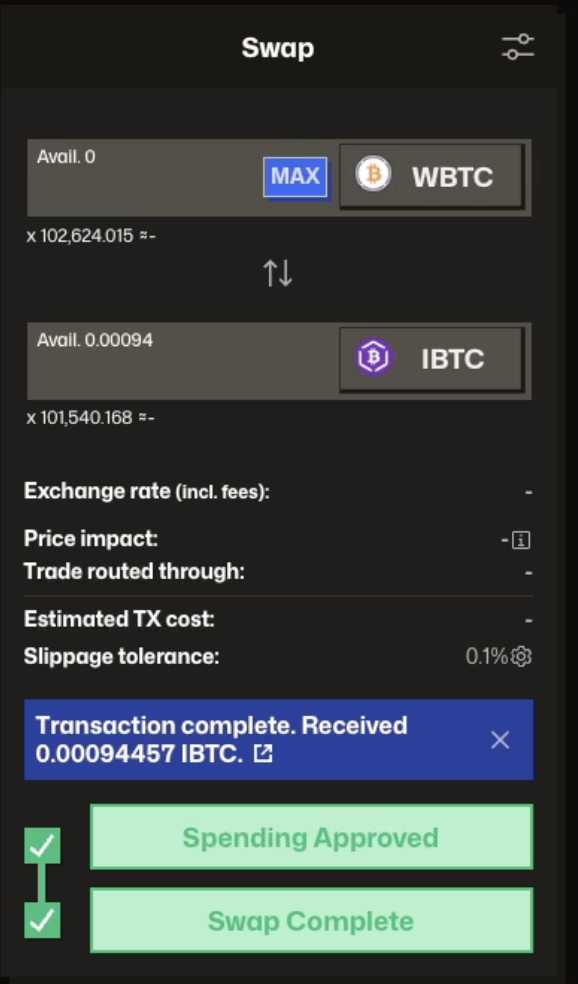
Step 7: Track Transaction Status
Monitor Progress:
After confirming, you can monitor the status of your transaction directly on CurveDEX or through a blockchain explorer like Etherscan.
Transaction completed
The swap typically completes within a few minutes, depending on network congestion.
Verify Receipt of iBTC:
Once the transaction is confirmed, your iBTC will appear in your connected wallet.
You can view your updated balance to ensure the swap was successful.
Conclusion
Swapping wBTC for iBTC on CurveDEX is a straightforward process that unlocks enhanced DeFi opportunities while maintaining the robust security of Bitcoin's Layer 1. By following these simple steps, you can seamlessly convert your Wrapped Bitcoin into iBTC and begin leveraging its benefits within the decentralized finance ecosystem.
What’s Next?
With iBTC now in your wallet, you’re ready to explore advanced DeFi strategies such as staking, lending, and providing liquidity on various platforms. Stay tuned for our next guide, where we’ll delve into maximizing your iBTC through CurveLend and other exciting DeFi integrations.
Pro Tip: Always ensure you are interacting with official CurveDEX platforms and verify contract addresses to safeguard your assets. Happy DeFi-ing!
Reply